 |
| Jodies Kitchen Personalized Cake Carriers |
These cute little cake carriers are not very hard to make.
I had seen some similar to this a vendor had in Tennessee while on vacation.I must say I was very tempted to purchase some,but at the price they were asking I thought it might be a project I could tackle myself for Mothers Day this year.
I was right these were not very hard at all...The hardest things are tying bows.
I have never tried to tie a bow and when purchasing the ribbon I didn't even have a clue as to what kind to get.After trying to make these I soon realized I probably should have purchased some that had the wire in it..I am pretty sure it would have been easier for a newbie bow tier like myself.
But hey it's a handmade project going to my Mother and my Mother N Law and I am sure they will not pick a part any flaws.
Here is what you need and how we go about it.

First you will have to decide on which type of cake carrier to purchase.I chose one each of the round and one rectangular.I decided on the round cake carrier for Mom due to the fact she bakes cakes at least once a week.My Mother N Law makes sweet treats as well but is known for making many goodies in oblong pans.I purchased both of these at dollar general for under $10
You may want to shop around to find one that is more sturdier than this.
** Choose a color scheme or theme**
This may depend on what color choices you have when you purchase your cake carriers.As you can see mine were pink.
** You will need stickers**
I chose stickers that had little or no glitter.Trust me with all this bedazzling going on it was hard to find many without glitter.
You do not want the puffy stickers either.They are very cute but will not hold up as well.
I purchased stickers from Walmart and soon found there wasn't much of a variety for what I wanted.I would definitely suggest going to a graft store for something like this.
As I said you could do a theme such as coconut for your Moms famous coconut cake,or perhaps she is into chocolate cakes you could definitely find stickers to go with that them.

** You will need ribbon**
Now as I said I am not a bow maker so I cant give many suggestions on that.Just make sure to choose ribbon that will coordinate with your theme.The size and shape of the ribbon will depend on what you want,so I cant tell you exactly how much.
I did purchase 2 solid pinks which were each 1 1/2in X 12in and two spools of a multi colored that were 7/8in X 2.7 These were both 100 % polyester
If you have never made a bow before and you aren't a perfectionist like me,then by all means, go for it!
If not consider talking with a florist.They normally will make bows for you.
Now you have everything you need ready and you can start placing stickers where you wish.
NOTE! You should only place the stickers on the lids of your carriers.They will not be dishwasher safe and you need to make sure and let the person receiving this gift be aware aware of that.I would never submerge the decorated lids in water either.The lids really shouldn't get that dirty and spot washing with a damp cloth where needed should work fine with the lids.
When you are ready to attach your bow to the handle of the carrier,remember they will at some point be removing this.So make sure to use a knot they can easily untie, and I used ribbon wire for attaching my bow.
Make sure to decorate both sides of your carrier or each end if using the oblong.
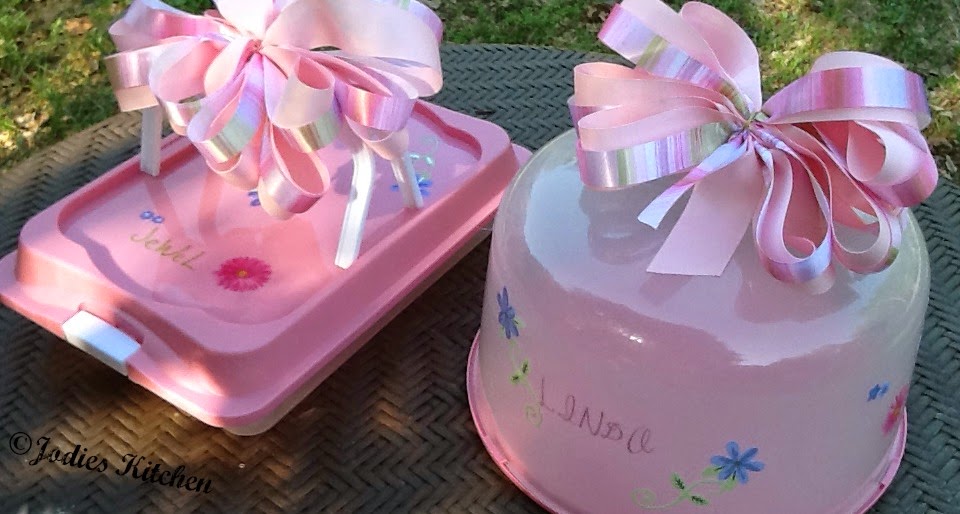
That way they look darn cute from every angle.
GOOD LUCK!

No comments:
Post a Comment